Showing posts with label 3D Model. Show all posts

Sunday, 6 November 2011

RENDERS


So I have got to the point in the project where I will be producing a majority of my final renders and drawings! Some of these will probably double up with what will be uploaded in my final presentation info, but this is just to show some of what I'm producing. 

I'm going to start with my 3d renders, then go through to the more standard drawings. (Some have been photoshopped, some haven't.


The main image I'm planning on using; creates a kind of humorous link to parliament as the Queen Bee.

Inside the cafe pavilion.

Inside the cafe pavilion.

Inside the information centre pavilion with the activity hubs.
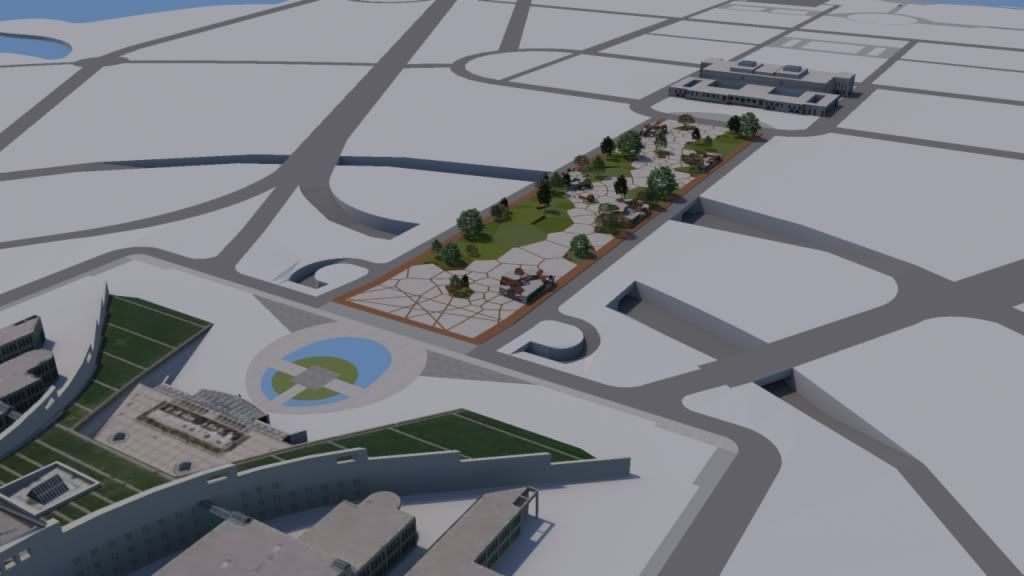
View from above (slightly angled)
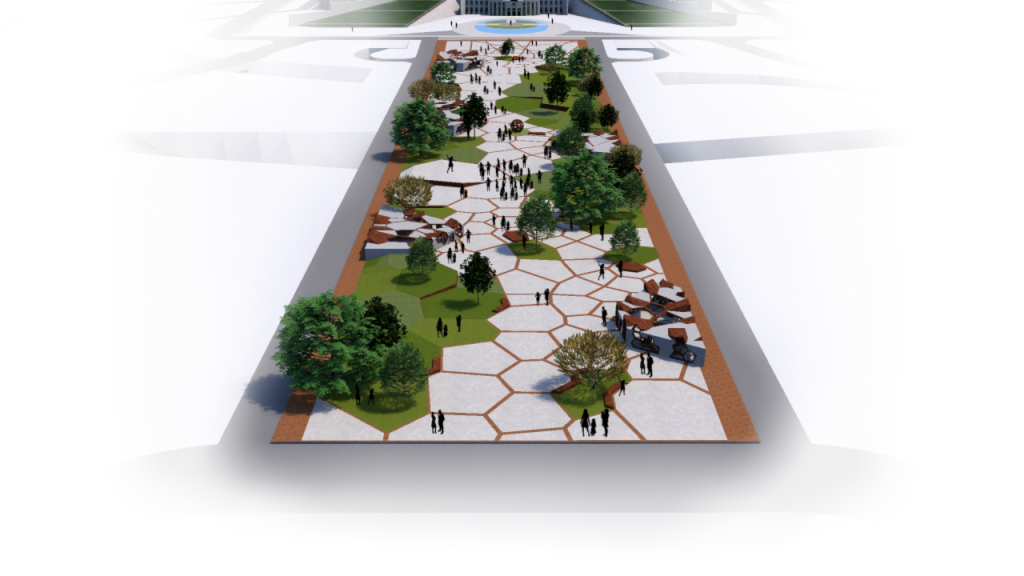
Site in use.
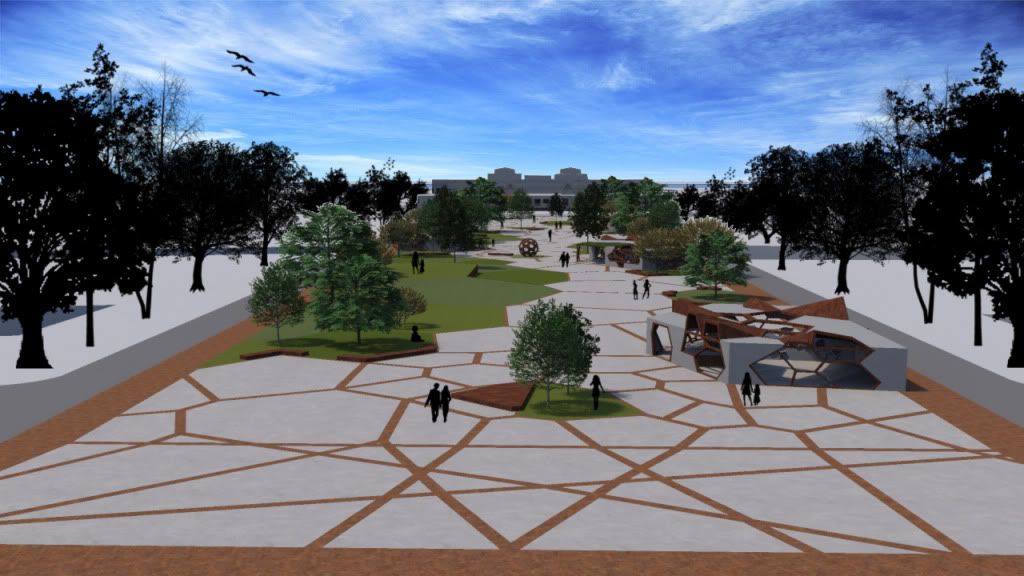
Towards OPH.
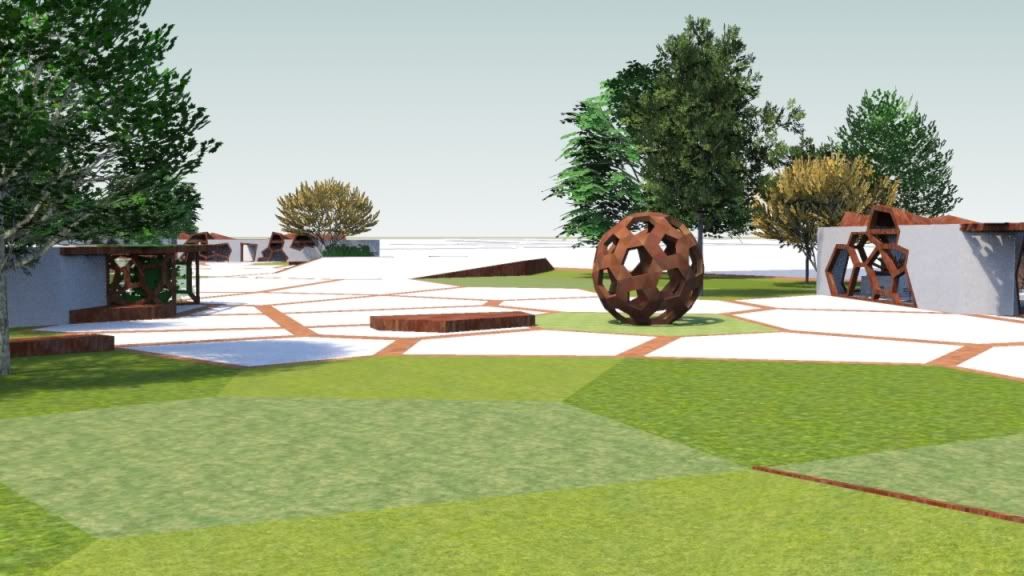
Celebration Space.
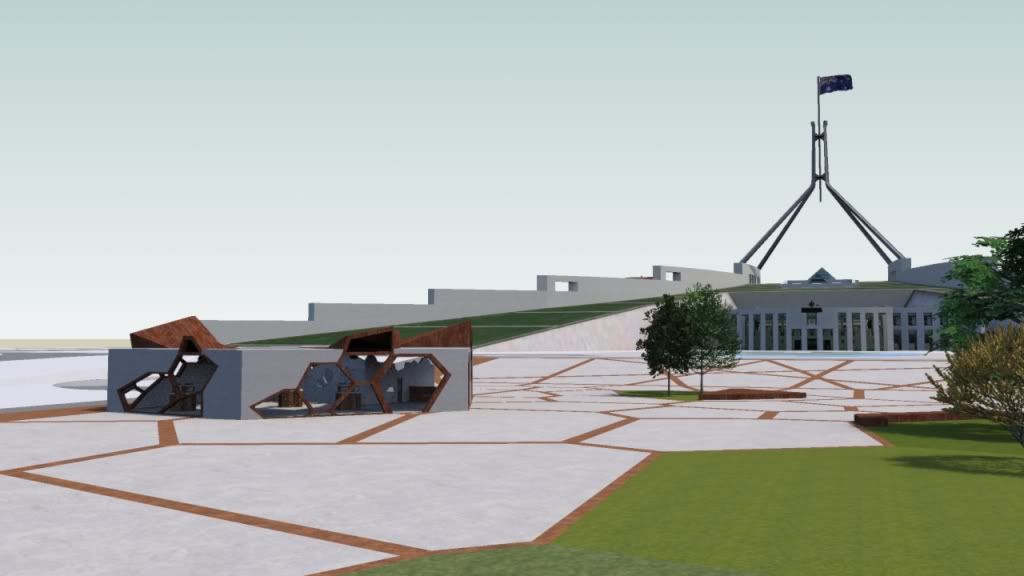
First pavilion.
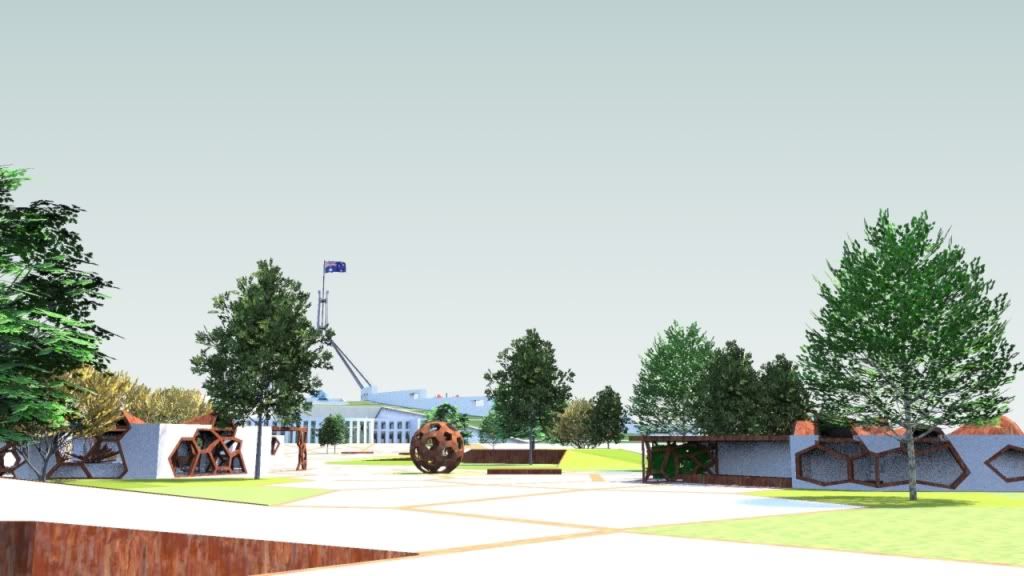
Looking down the mall.
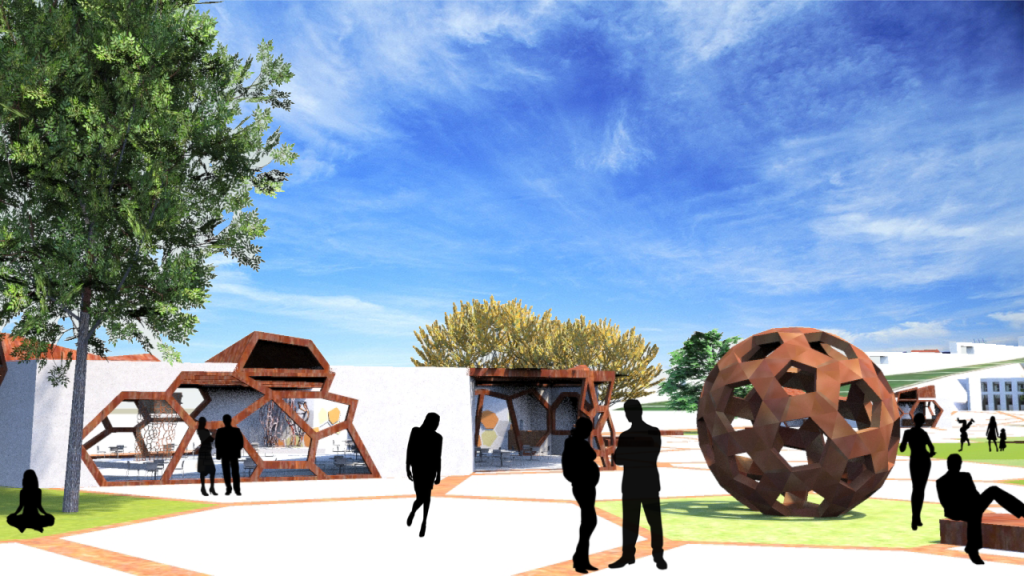

Cafe pavilion.
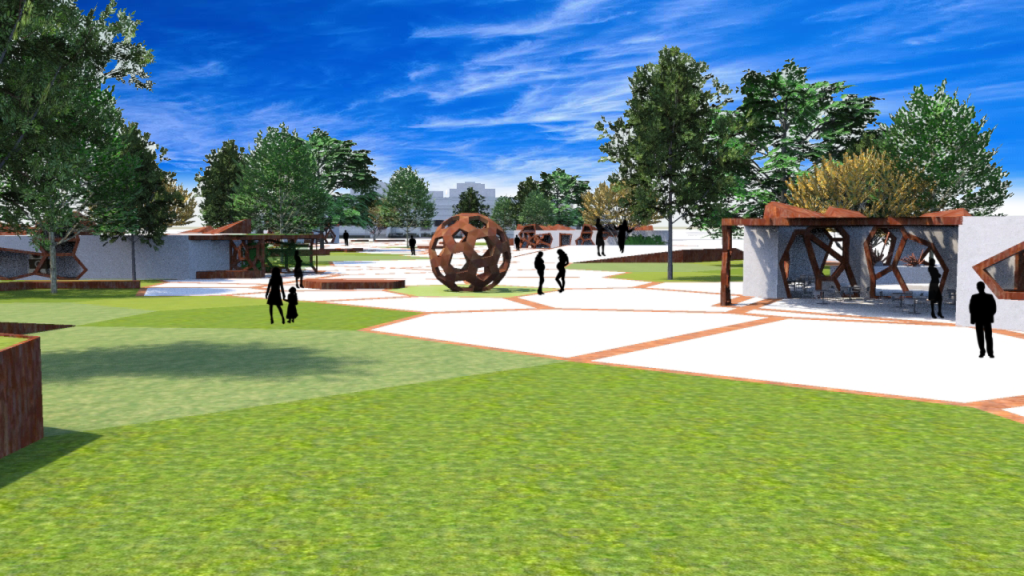
Amenities pavilion.


Saturday, 5 November 2011

INTERNAL ACTIVITY HUB PROGRESS


I've (roughly) designed the activity hubs for use within Federation Mall (these differ to the ones that will be dispersed across Australia). However, the design concept is quite similar to allow for linkages.


The purpose of these activity hubs is to learn, communicate and collaborate with the government through virtual means.


DISTRIBUTED NODES


Ever since the first project, I have been toying with the idea of incorporating dispersed "activity nodes" in cities across Australia (this relates to our initial concept). I'm currently waiting for my final 3d model to render, so while I have the time on my hands, I've developed these further so I can incorporate this concept into my presentation. I think it is necessary, as it links the federation mall design to other cities in Australia, through learning and communication.


I have purposely kept the design quite similar to the elements in my federation mall design, so that the physical/visual connection is there.
I have designed the nodes quite modular, so that they can be taken apart and packed into storage containers and travel via the rail network. The roof structure fits together from 4 hexagons, whilst the upright section slots into the floor plate (each angled piece is seperate, with a joining connector at the angles).
The floor plate also fits together like a puzzle.


Initial sketch of some ideas;


Modelled up in SketchUp (materials are yet to be added);


Thursday, 3 November 2011

CELEBRATION SPACE MODEL PROGRESS


S I've been modelling the space up further in SketchUp. Here are some renders of what I have so far. At the moment, no trees have been put in, and a few materials aren't showing up.


View from above. I'm still focusing on the green space elements, rather than the tiling elements for the time being.


CELEBRATION SPACE PROCESS


I've now moved onto developing the "celebration space" (the open space between the pavilions). 
A few notes I had noted down (for possible ideas):
- Small bounding walls around sections of the grass to show a clear divide between circulation space and green space
- Using different grass to display the different hexagons
- Pushing / pulling various hexagons; pulling one to create a raised stage area?
- Inserting small grass nodes within the paved areas for resting spaces / trees etc
- Using the sides of the hexagons to determine seating locations
- Pushing up some areas to create a change in contours (integrated the wall and the hill, from the original concept of "the flag, the hill, the wall"


A sketch of possible locations for some aspects...
Shows the adding in of more green space, dotted lines representing where raised areas could go, and seating locations. As well as the possibility of some actual gardens within some hexagons in the green space.


I've started to play around with adding in some slopes, etc. in the model (just a screen capture, hence all the lines and bad quality).


PAVILION PROGRESS


So I have been working predominantly on the pavilions for the last few days. Below are some renders of what I have achieved so far. I was told by Cameron to keep going with this approach to the pavilions, and to really focus on two of them (in regards to detail), and to then spend a lot of energy on the actual site itself. 
Note; I have the different paving materials / colours turned off in these renders, so the hive paving can't actually be seen. 


Information / activity centre - OPH end

As above.

Learning and worship spaces; I plan to integrate the blank wall into the green space, hence why it is currently blank.

Amenities building. Seating, etc. to go in along blank wall.
Also playing around with the idea of integrating some climbing greenery onto the structural hive barriers, etc.

Cafe and gallery spaces

As above, front entry

Information / activity centre NPH end. I have probably gone furtherest with this pavilion; I have started on the internal walls for the office sector, and started to integrate some interesting ornamentation.

As above. 

Site from an angle above. 


Tuesday, 1 November 2011

PAVILION REFLECTION AND PROGRESS

I finished my last piece of assessment for all of my other subjects yesterday afternoon, so now I only have design to work on - what a relief!


We're meeting up with Cameron this afternoon for our last catch up tutorial, so I haven't had much time to get a large amount of work done since last Friday. I have been working on it all morning, so I do feel like I've gotten somewhere in regards to the pavilions...


Cameron told me on Friday to just extrude them up, which I did. However, I then got a bit stuck with what to do with the elevations...
I had a bit of a play around, and was inspired by this building (which I posted a few weeks ago under inspirations)...
I was really inspired by the section of these "pods", as well as the materials used.

I had a bit of a play around, sketching a few different ideas.
From the sketch you can see I started playing around with what areas should be blocked out, and what areas could be possible windows in to the pavilion - as they are public spaces, I don't want them to be too closed off. I also started to play around with possibly extruding parts of the hive upwards for possible development of the roof.

So I decided to try and achieve this in SketchUp... the internal wall is a recent addition that may be changed...

 I built of these extruded sections, and made some light wells and roof openings to bring in some extra light.


I'm not too sure how I feel about this... I think I'll keep going with it, and see what Cameron says, in case he has any other suggestions.


Sunday, 30 October 2011

PAVILION DESIGNS


I sketched these little sections last week sometime, so I could start playing around with the shapes of the pavilions.


From here I've done a few rough shapes in SketchUp... trying to create some of these sections.


I showed this to Cameron on Friday, and he suggested I try to go for a more simple 'extruded' pavilion approach, so I think I will go forward with what he has said...

Tuesday, 25 October 2011

3D MODEL PROGRESS

I've changed the hive concept within the site plan in my 3D model, different shades of colours have been used for visual purposes (when the image is rendered, the detailed hive pattern wouldn't be seen...). It's looking pretty cool. Kind of reminds me of a kaelidascope!

Now full steam ahead towards designing the pavilions!


Monday, 17 October 2011

3D MODEL PROGRESS (CONTINUED)


I've been adding in the hive pattern on to the site... at the moment I have marked which areas will contain green space (green), paved public space (grey) and pavilions (orange). This may change, I'm still playing around and experimenting with it... but this shows quite effectively the hive pattern at place within the mall. I think it looks pretty cool!